Integrate Supabase User Auth with Adalo (Email)

I tried auth with Aadalo when Supabase release, but it seems like there is a bug; I can't keep the user token from Supabase after login; that's why I didn't blog about it. Recently when I try again, it seems like the bug has fixed; that's why I am writing this post to share how you integrate Supabase User Authenticate with Adalo by email. This post focuses on sign-up by email only. Supabase supports other authentication types, including phone and social authenticate; I will try to post about different ways of authenticating soon.
First, let's configure the Supabase setting and keep a few essential pieces of info to use for the setup later.
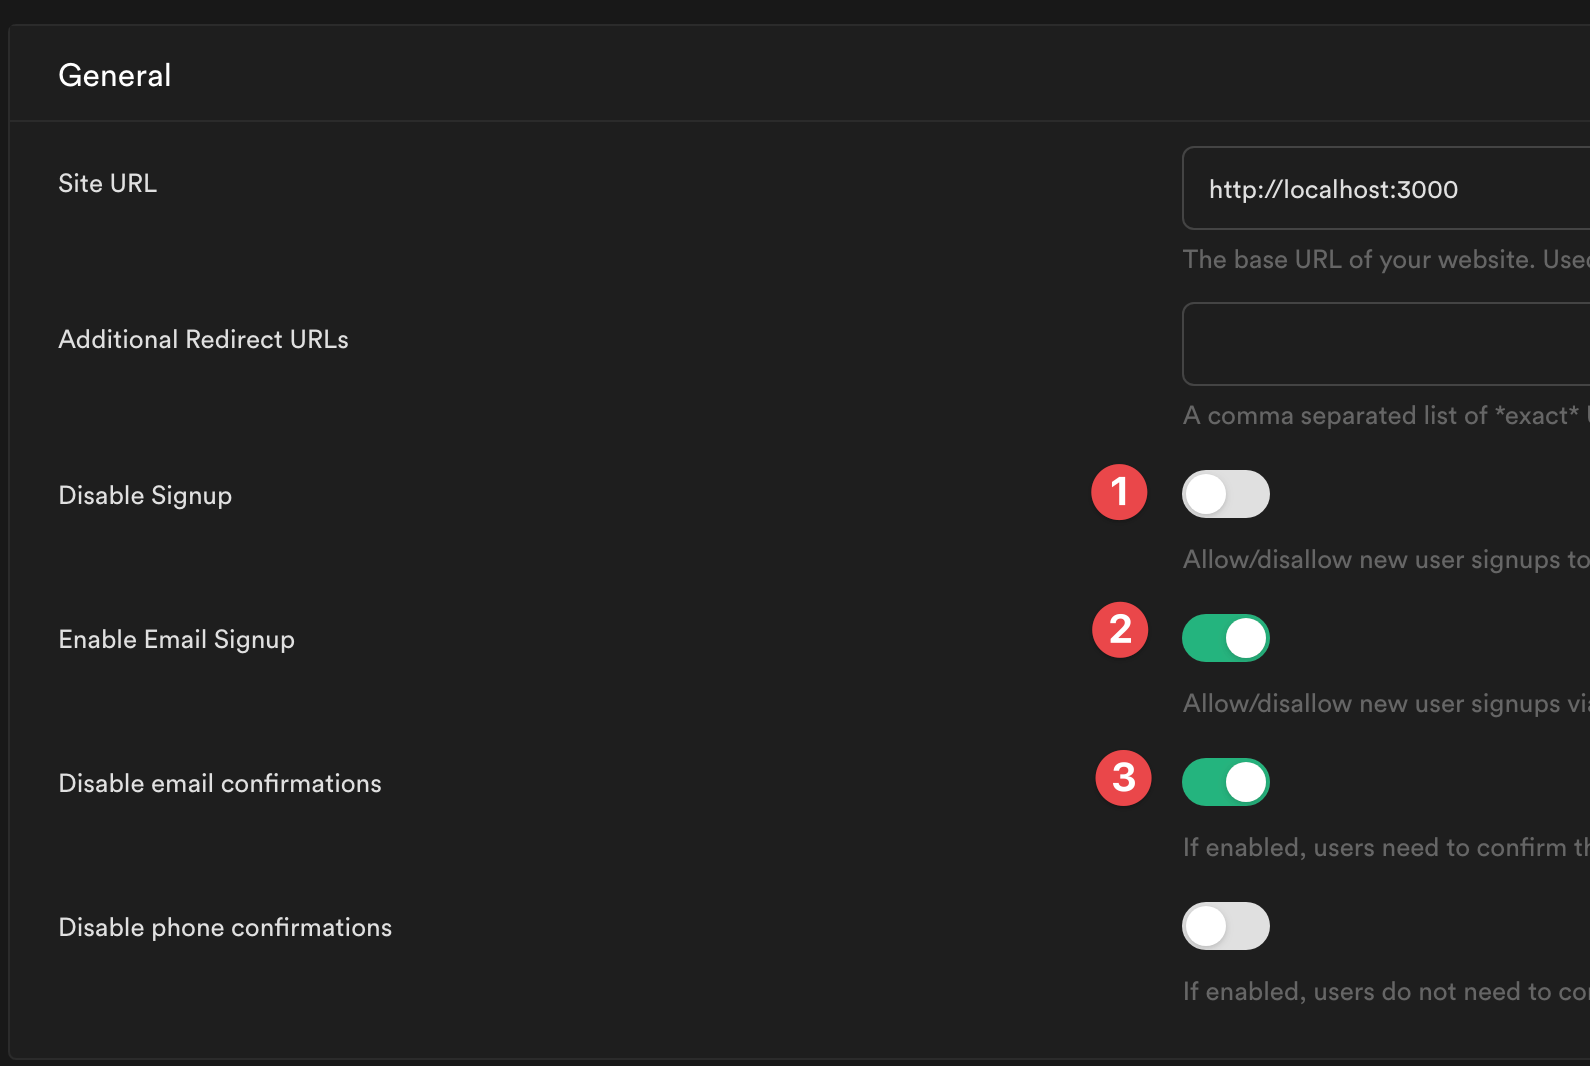
Navigate to your Supabase instance -> Authenticate -> Settings. make sure that
Disable Signup is "disabled".
Enable Email Signup is "enabled".
Disable email confirmations is "enabled".

Next go to Settings -> API.
The service_role key is what we need to query the API later, and the unique URL of your supabase app will be part of the API. So please keep those two records.

That's all for Supabase, next let's create a new Adalo app. Click in Advanced Options during the new app process and select External Users Database and Authentication (Beta).


Once the app is created, a popup modal will guide you through setting up this external user feature.

Start with setup login; make sure you have a Supabase user account that you can log in successfully; this user account is not the user account you use to manage your Supabase instance.
The login URL will be /auth/v1/token?grant_type=password, ensure the Header has been setup - apikey will be the key, and the value is the service_role key. Next, set up two more parameters: the email and password, create a JSON body that consists of the email and password. The default value for email and password should fill in something valid.
Once login is tested successful, you can access two parameters; let's set up the access token and the user id since you most likely will use those two parameters to do any external query.


Once the login process is done, let's move on to signup. The sign up URL will be /auth/v1/signup . Follow the same of the previous steps, set up the Header, JSON body and input. The default value of the input should be a new email.
Follow the login step to keep the access token and user id.


Once you finish the signup process, you can click the Save and finish later, no need to keep pressing the Next button because it won't work.

The External User Authentication has done; you need to configure the Signup and Login Screen. There is no need to set up any collection for those two-screen; configure the button action, you will see the External Login and External Signup action.

Let's see if I can make the phone authentication work and share it with you all next round.